How To Create Git Repository For Ros Package
Introduction
In last post I’ve covered some basics of version control and in this post I’ll explain how to create ROS repository for ROS package and how to push your first changes.
Instructions
Instructions are divided in 3 sections. First section is Initializing git repository and it is dedicated for repository initialization. Second section is ROS package as git repository which explains how to initialize git repository in newly created ROS package. Third section is Forking/Changing remote of git package and it’s dedicated to changing remote in ROS package which already has initialized git repository.
Initializing git repository
[1.] If you don’t have github account create one
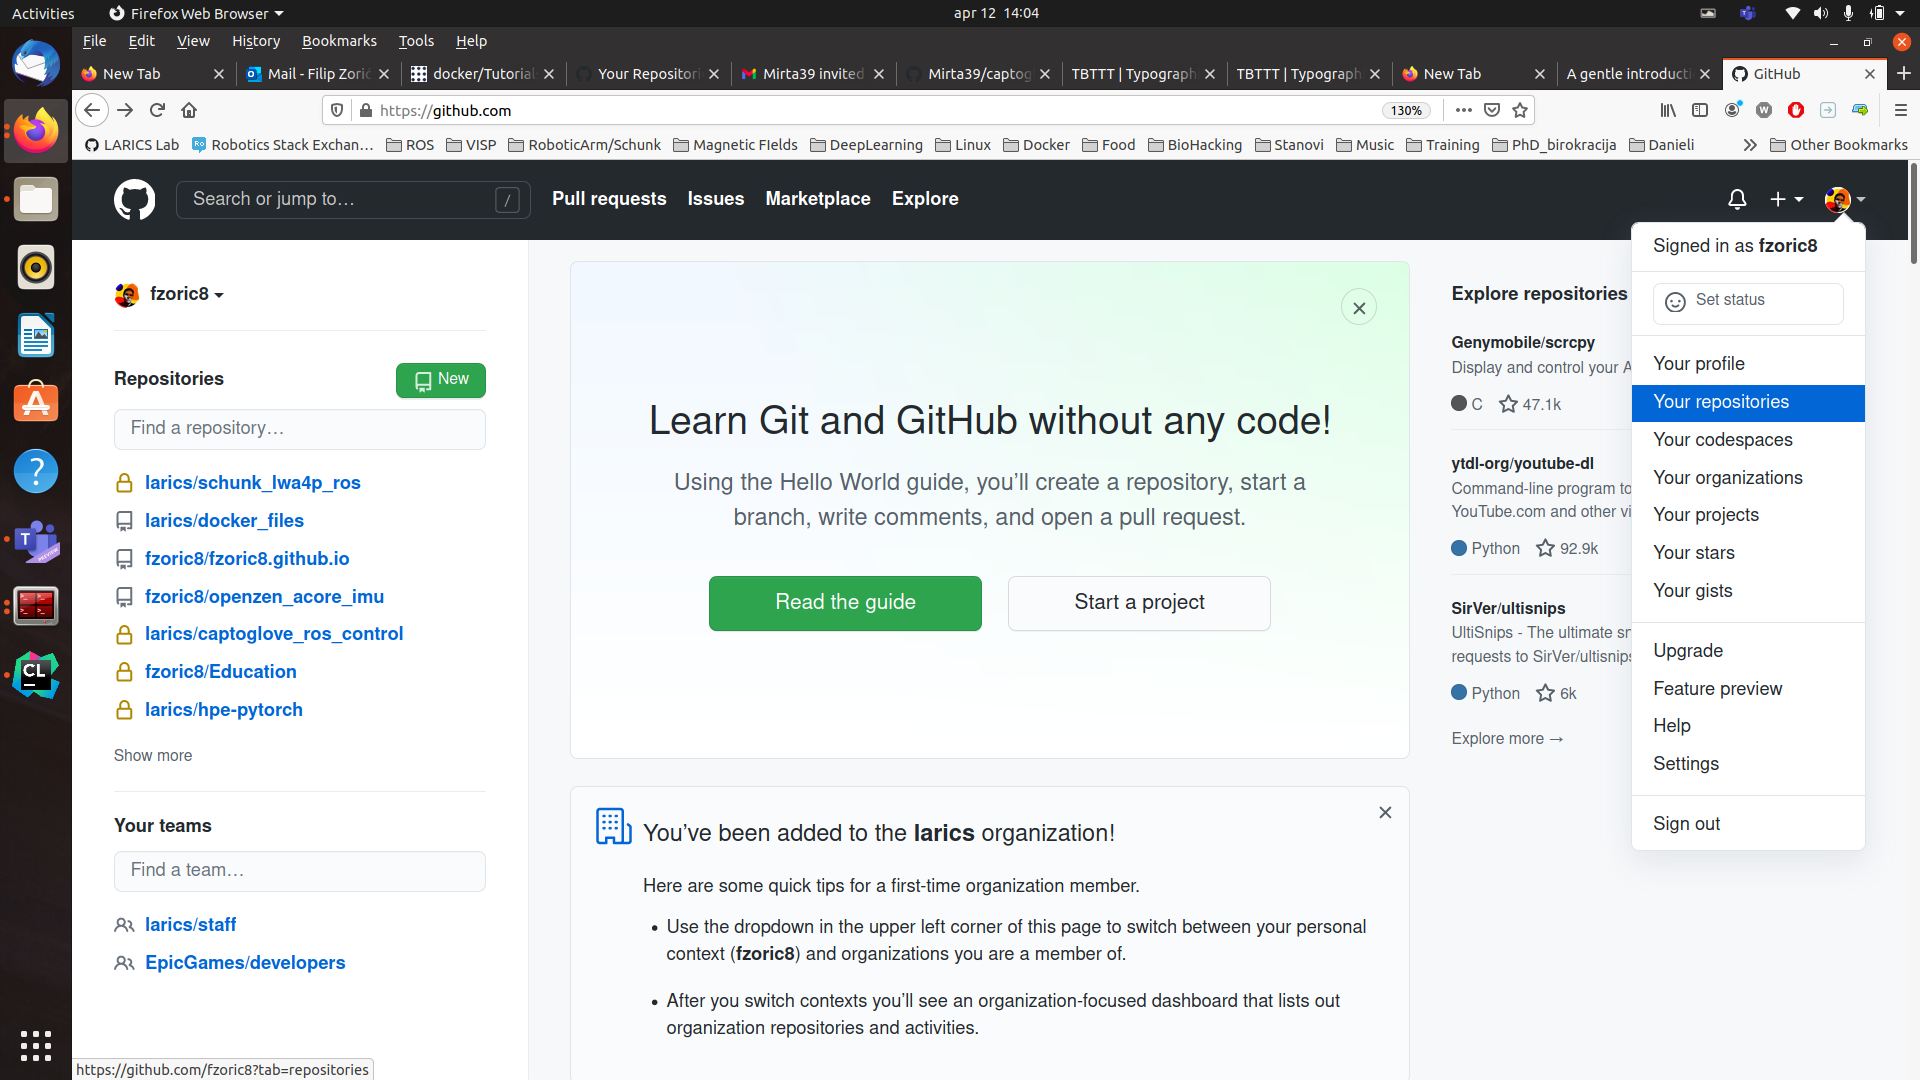
[2.] After account creation and signing in, you should see screen as shown on Figure1. In upper left corner, click on down arrow beside your avatar and choose Your Repositories
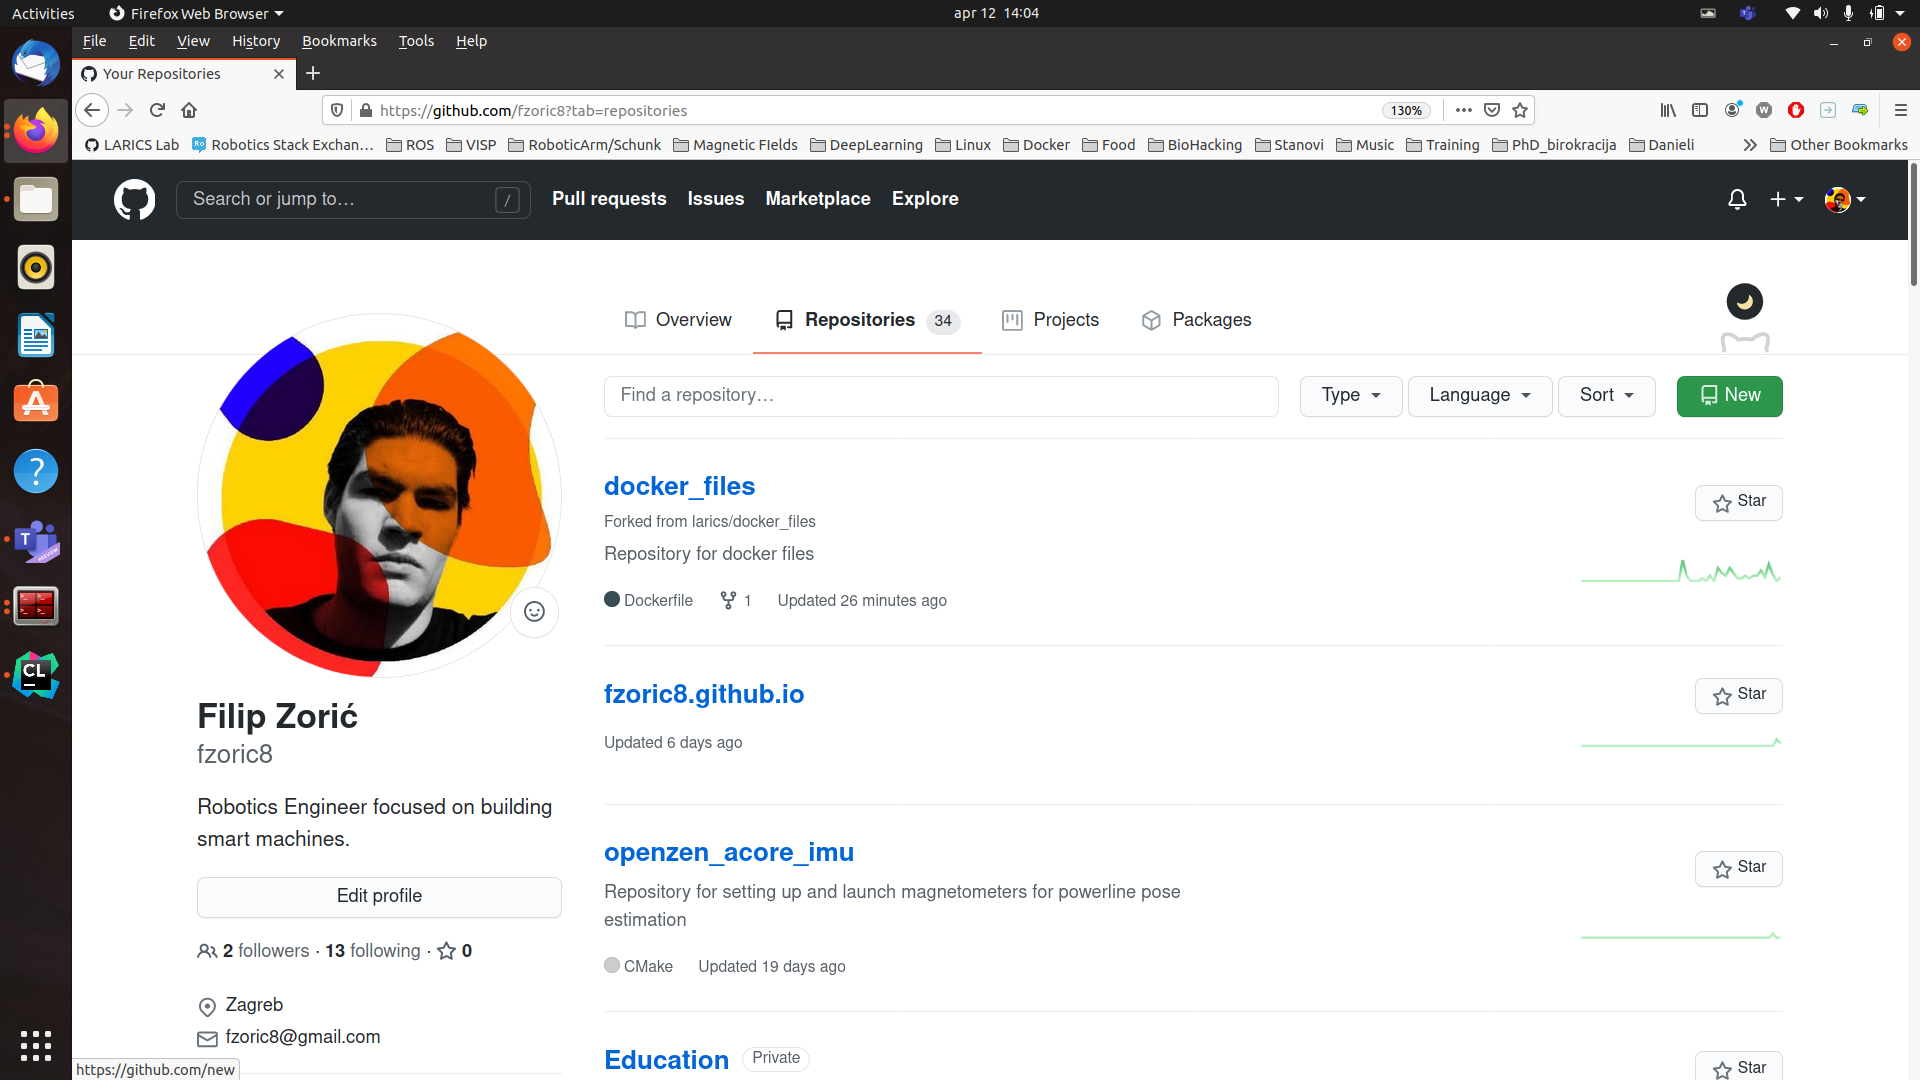
[3.] After entering Your repositories section you should see all your repositories as shown on Figure 2.
[4.] You can create new repository by clicking green New button which will open form that’s shown on Figure 3.
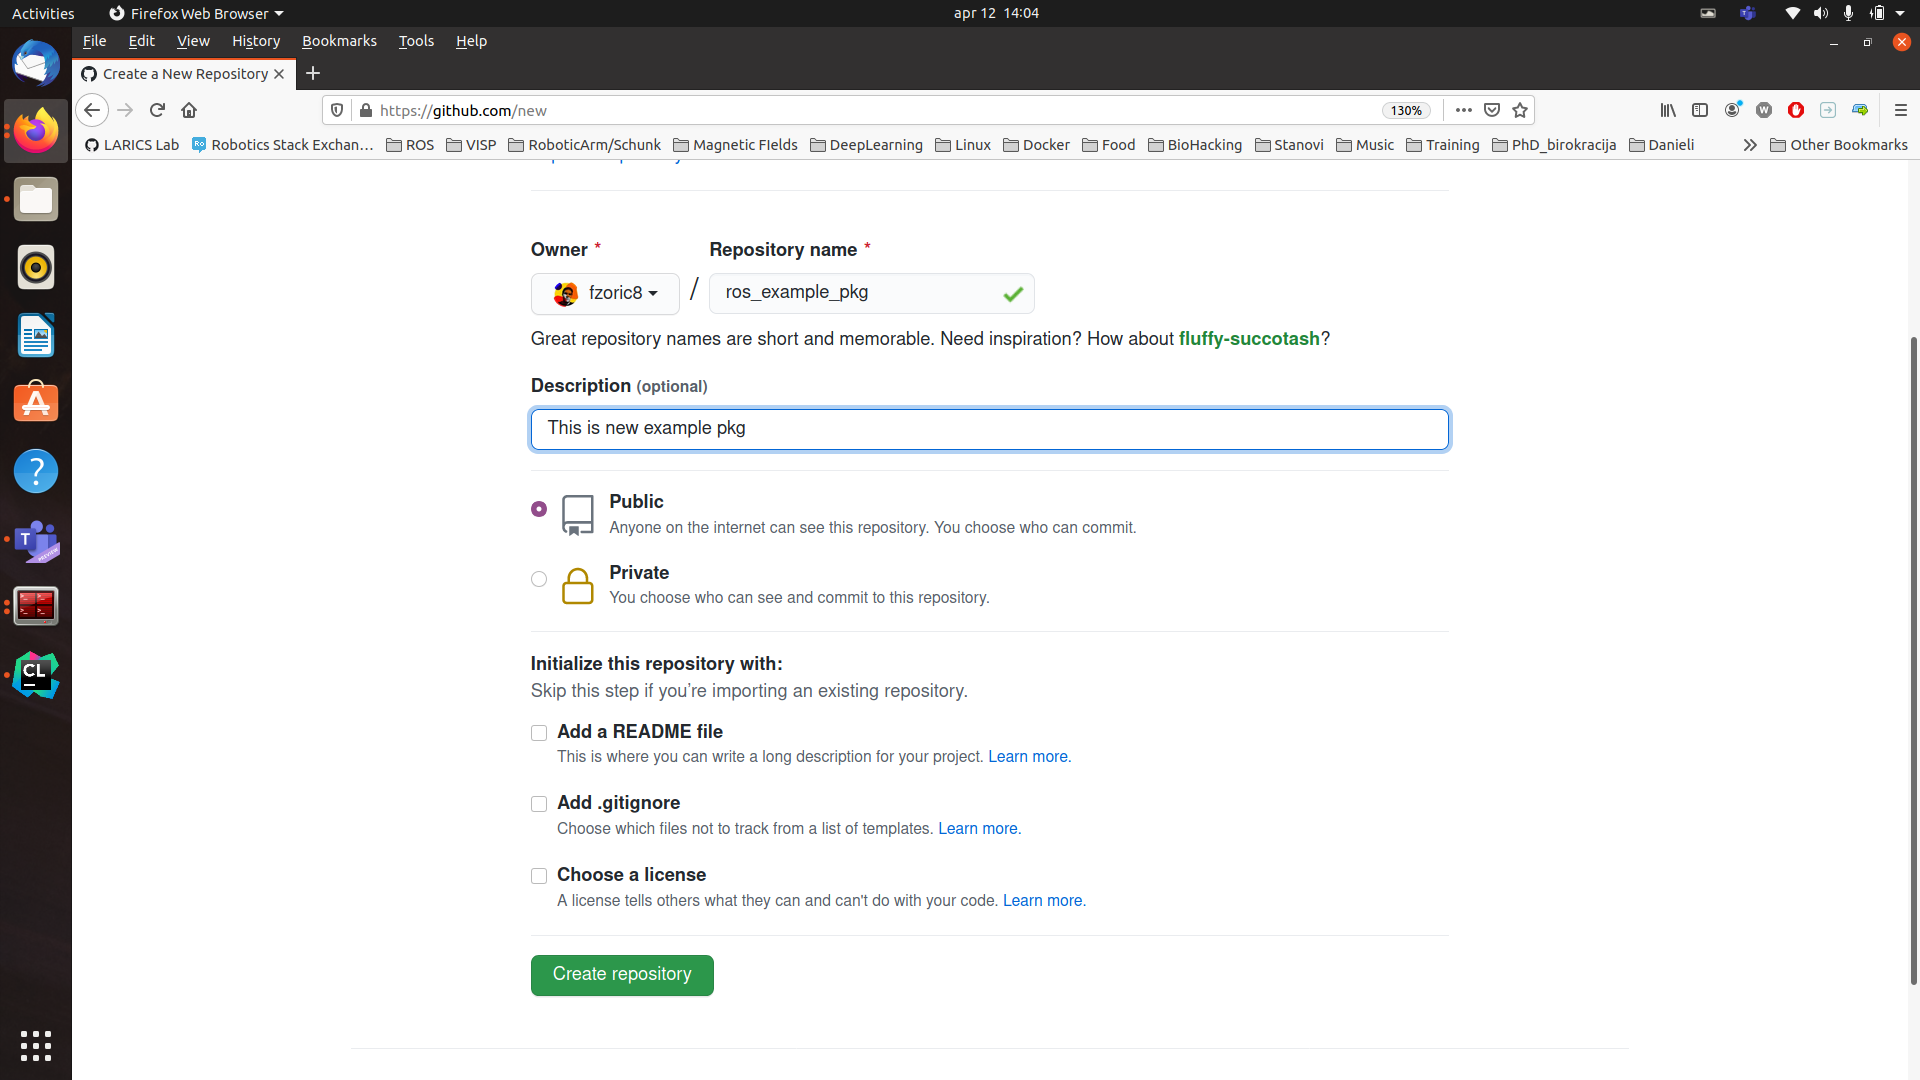
[5.] Fill out form with Repository name matching your ROS package name, add description, setup repo on Public (assuming you have free github account) and ** leave all
checkboxes empty in ** Initialize repository with section and click Create repository and you should get something on Figure 4.
ROS package as git repository
If you have already created your ROS package following this instructions you can initialize git repository in it as follows:
[1.] Navigate to ROS package destination cd <path_to_catkin_ws>/catkin_ws/src/ros_example_pkg
[2.] Initialize git repository git init
[3.] Add all available files with command git add . or each file separately git add <filename> to staging area
[4.] Check status of your files in staging area with command git status
[5.] If you have added all files you want to track with git, create your first commit with command git commit -m <custom_message> e.g. git commit -m "Initial commit
[6.] After commiting your changes, add remote (code stored on a code hosting service e.g. github) to your local git repository using following commands:
git remote add origin https://github.com/<github_username>/<git_repository_name>
e.g.
git remote add origin https://github.com/fzoric8/ros_example_pkg
[7.] After adding remote, you can push your changes to it with following command:
git push -u origin <branch_name>
e.g.
git push -u origin master
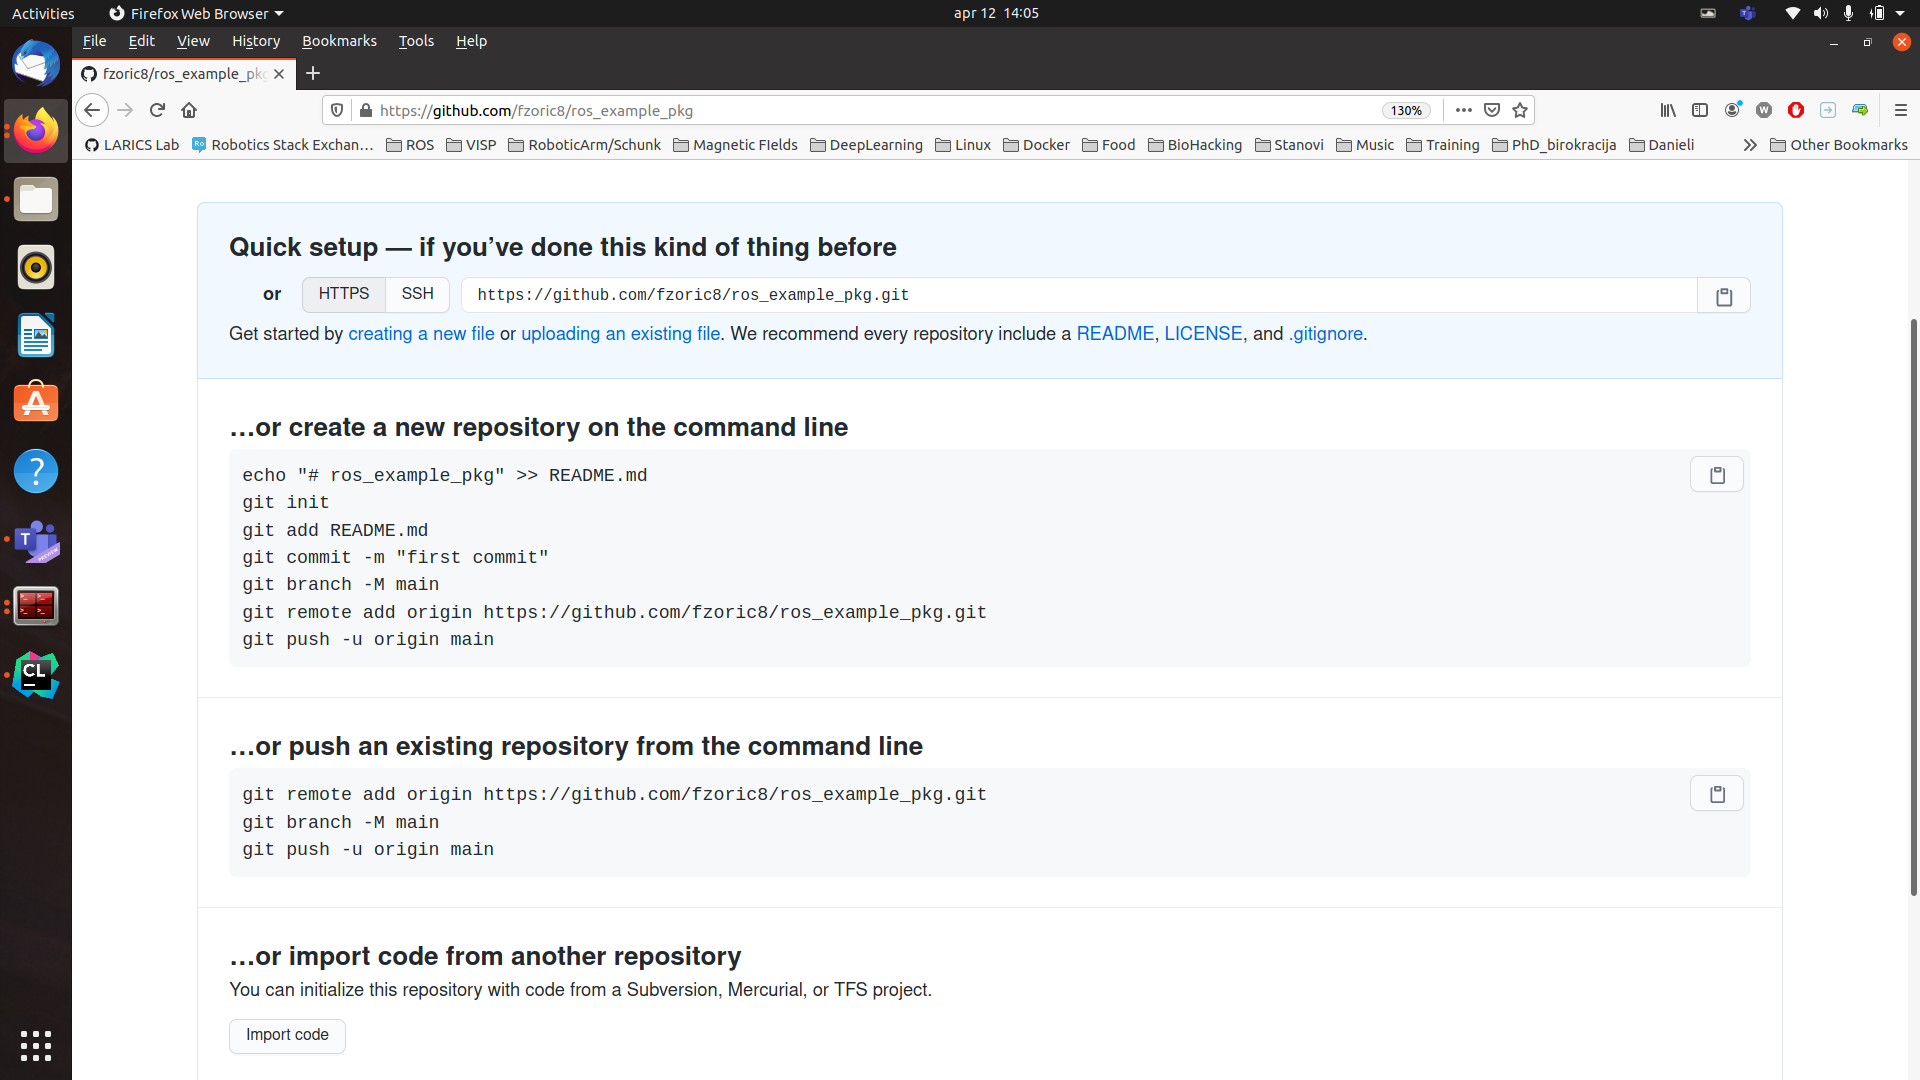
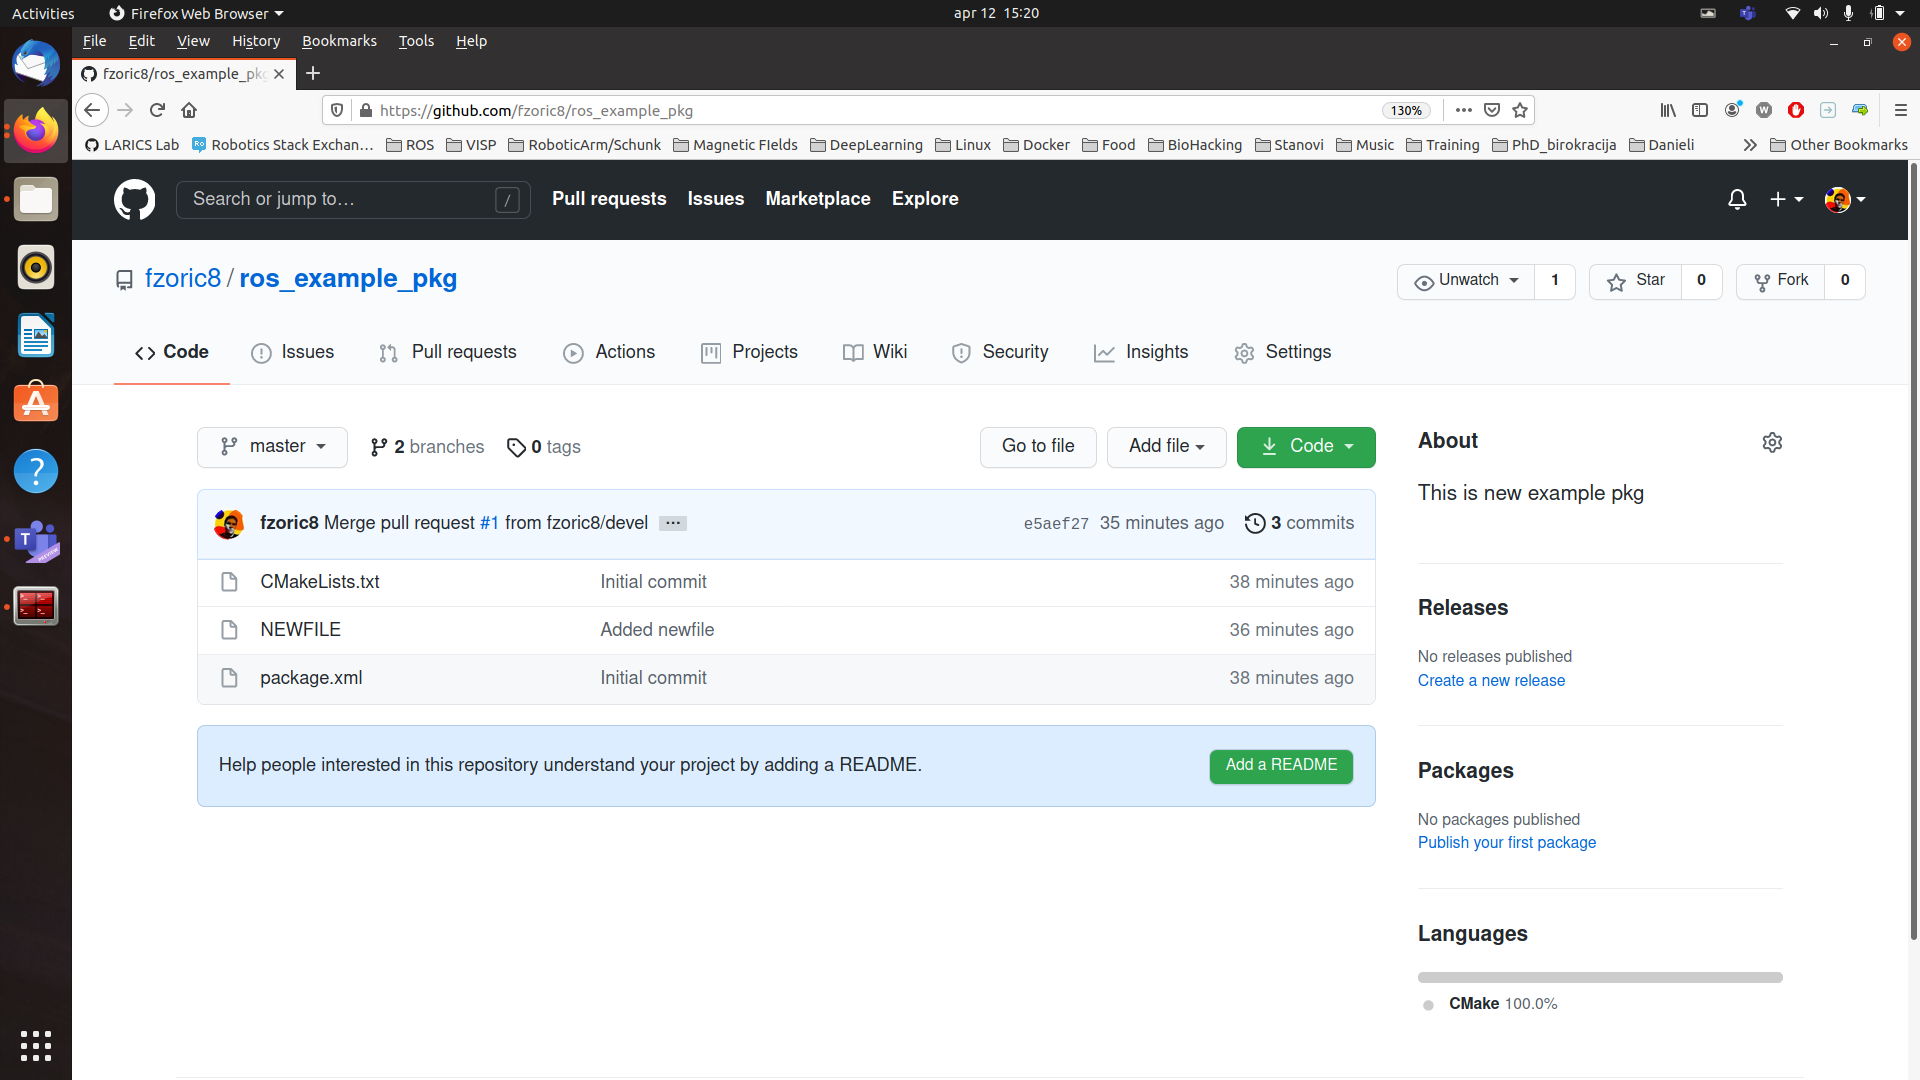
If you followed all commands, you’ve succesfuly created git repository for ROS package and you should see something as shown on Figure 5.
Adding already existing ROS package for further editing
There are cases where you want to work on someone’s else ROS package and you want to change remote repository to which we push changes. You can do that by forking repository or by cloning it and removing remote.
You can fork repository following this instructions.
If you have already downloaded repo, you can create your own repository with same name, following Initializing git repository instructions.
After that, you can remove existing remote in that ROS package with following command:
git remote rm <remote_name>
e.g.
git remote rm origin
After removing remote, you can add your newly created repository as new remote as explained in 6. step in Adding git repository to ROS package
git remote add origin https://github.com/fzoric8/ros_example_pkg
You can check your remote by typing git remote -v
After that, you are ready to push changes following 7. step in Adding git repository to ROS package